All posts by lance

iOS Splitting Albums + Unknown Album Problems Apple Music

The situation: you have albums that seems to be properly organized in your Apple Music Library (formerly iTunes) on your Mac, but when you sync to your iPhone, iOS for some reason either splits albums (two or more albums with the same artwork, title, artist, but with different tracks spread across them) and/or labels some albums as Unknown Album. It’s FUCKING MADDENING. You’ve double-checked your meta data to make sure you have the same album title and artist for each track, etc. (if you haven’t, do this part now). You’ve changed the album title to something weird, then renamed it back and did a sync, no change.

I finally found a thread not on Apple’s site that properly explains the issue. It’s posted here on iLounge and it’s brilliantly explained with a super-simple fix. The basic gist is that iTunes/Music has a weird issue when writing between the iTunes database and ID3 tags on MP3 files. The issue doesn’t seem to appear on purchased items or AAC-encoded songs. Here’s the fix:

Set aside a few hours so you can sync your phone uninterrupted. I set my up to run overnight and woke up to no issues.

  • Plug in your iPhone, launch Finder and select your phone
  • Under the Music tab, uncheck Sync Music…
  • Sync your phone.
  • Once you’ve confirmed all the music off your phone, then open Music on your MacOS device.
  • Make a new Smart Playlist (File / New / Smart Playlist) with this setting
    • Kind / is / MPEG audio file
    • uncheck limit
  • Open this new playlist and Select all tracks then hit:
    • File / Convert / Convert / Convert ID3 Tags
    • Check ID3 Tag version and choose v2.4
    • Hit Okay
  • Depending on how many MP3 files you have, this could take a few minutes. Once done, sync music back onto your phone.

That’s it. If you add new MP3 files to your library in the future, you might have to do this for the new tracks. Or you know, Apple could update their fucking shitty software.

Bluetooth Problems MacBook Pro Early 2015

All of a sudden having weird issues with Bluetooth connecting after a power cycle. There are a bunch of tips on the Internet – deleted BlueTooth plist files, debug / remove all devices, reset module, etc. In the end, the only thing that worked for me was the SMC reset. Following that everything was dope.

  1. Power off MacBook
  2. Plug in AC adapter.
  3. Press and hold Shift + Control + Option and then Power and keep pressed for a 10 seconds.
  4. Release all keys simultaneously.
  5. Hit power button again.

Cheers

Early 2015 MacBook Pro 13″ Retina – dead trackpad/keyboard

You’ve got a 5 year old MacBook Pro 13″ Retina – and suddenly at login you can’t type your password, because the trackpad won’t track and the keyboard won’t type. Resetting the SMC or the VPRAM doesn’t do anything. You’ll need to replace the trackpad cable that connects the logic board to the trackpad. It’s a well-known/reported user complaint that Apple has never officially recognized. There are a bunch of tutorials on the web that will walk you through the process. The cable is less than $10 and more than worth it to extend the computer for another few years. The only addition I’d make to most tutorials is that once you remove the original cable, use it as a guide to “kink” the new cable since it’s longer than necessary. You’ll kink it once near the logic connecter and another near the connection under the trackpad. That’ll give it the proper length as well as accounting for any swelling that happens with the battery.

Speaking of batteries – I recently replaced the battery (not difficult, just stressful) as well as upgrading the SSD to a 2TB (super easy).

Fullscreen Video Flickers in Chrome Browser on Macbook Pro

I recently noticed that Amazon Prime Video (Six Feet Under, for the millionth time, natch), was doing an odd triple flicker when playing back in fullscreen mode within an updated Chrome browser on an Early 2015 Macbook Pro running Mojave 10.14.6. The fix seems to be turning off hardware acceleration within Chrome. Playback seems clear after that. YMMV. Steps:

  1. Click the three dots on the upper right of the Chrome Toolbar.
  2. Click Settings
  3. Search “hardware”
  4. Toggle of Use Hardware Acceleration.
  5. Chrome will force a relaunch of the Browser.

Handbrake No Longer Rips DVDs on El Capitan and Higher

Long story short, there’s a new security feature that prevents libdvdcss from being installed, which is the key to ripping DVDs (for back-up purposes only – natch). You’ll need to install X-code, X-code command line tools, then Homebrew and then libdvdcss.  Restart Handbrake and you’re good to go.

  1. Follow these instructions for XCode and Homebrew install.
  2. Then in terminal enter this text:
brew install libdvdcss

All Contacts Have Disappeared From my iPhone

Symptom: All your contacts have disappeared from your iPhone and perhaps from your address book, and MobileMe contacts as well.

Cause: Updating the MS Office software on your Mac. For some reason certain patches of MS Office will cause an issue with your sync services.

The Fix: This is specific to Macs running MS Office:
1) Launch Outlook on Mac and under Preferences, de-select Sync Services.
2) Close Outlook and then re-open.
3) Re-enable Sync Services.
4) Wait.

Your contacts should start appearing in your address book, iPhone contacts and MobileMe contacts. This can take anywhere from 30 seconds to 5 minutes depending on your connection speed.

Do you want iTunes to accept incoming network connections?

I kept getting this message every time I start iTunes no matter how I answered the prompt. This message begin appearing following some regular software update. Here are the steps to fix – YMMV:

  1. Go to Library / Preferences
  2. Find this file: com.apple.alf.plist
  3. Trash the file.
  4. Reboot your Mac.
  5. Start iTunes – you shouldn’t be prompted anymore.
  6. Go to System Preference / Security and re-enable your firewall.
  7. Start iTunes again.  You shouldn’t be prompted.

You’re done.

iPod Classic Won’t Sync with iTunes 9.2

I recently updated iTunes to the 9.2 version. My iPhone 3GS would sync with no problem. The first time I went to sync my 160GB iPod Classic, iTunes hung and I got the pinwheel of death. I restarted my Mac and rebooted my iPod, but still had the same problem.

The fix: Wait it out.

Just leave your iPod connected to the Mac. In anywhere from 5 to 20 minutes it will eventually start syncing. The harddrive on the iPod was definitely spinning during that time, so I’m going to guess that iTunes was optimizing the file structure or some such nonsense, but failed to put a user-facing messaging indicating as such into iTunes.

Crazy new Horvath/Kim pieces come home!

My Friend Dave

Monster #14

I got incredibly lucky and stumbled into GRNY at the right time a few weeks ago, just as an interim art show was being launched.   Some amazing work was there – a little bit of everything.  But the highlight by far, at least for this camper, were some custom David Horvath and Sun-Min Kim pieces.  David has been customizing some of his My Friend Dave kaiju and I scored the only lemon-lime one at the show.  And as incredible as that piece is, Sun-Min’s resin Monster #14 is out-of-sight.  I’ve never owned a resin piece before so the sheer weight of this guy is shocking.  It’s definitely not a toy – it has the heft of a statue and it’s gorgeous.

How to fix a locked-up iPhone

My iPhone 3GS locked up this afternoon for apparently no reason.  Lovely.  Here are the steps I took to repair this particular iPhone.  Your mileage may vary.

  1. Hold down the power and home buttons for about 6-10 seconds.  The phone will reboot, if it works from that point, you’re done.  Congrats.
  2. If not, try once more.
  3. Boot up your computer and launch iTunes.  Make sure it’s up and running, not updating or anything before you start the next steps.
  4. Plug the iPhone into your computer.
  5. Press and hold the power and home buttons until it resets.
  6. As soon as the phone resets, let go of the power button, but keep holding the home button.  Get a good grip, you’ll be holding it for 30 seconds or so.
  7. Eventually your iPhone screen will change to the “plug into iTunes” logo.
  8. Your computer will inform you that the phone is in recovery mode.  Follow the on-screen directions.

What will end up happening is that iTunes will wipe your phone, reinstall the OS and firmware, and then sync all your info.  This will take a while.  You’ll lose any photos, gamesaves, etc, that occurred since your last sync.  So… make sure you sync often.

Toy Fair Quick Glance

Some quick highlights: Uglydolls booth is amazing as always. Their new tin toys produced with Schylling are spectacular. Lunchboxes, trucks, robots and alarm clocks are crazy detailed and fairly inexpensive. Looks like MSRP is between $4 and $8. Wow.

Lego and Playmobil are solid. Nothing mindblowing but dependable. That’s why they’ve been around as long as they have.

I’ve only cruised maybe 5% of the floor but so far Diamond is the most fun booth because of the variety of companies and product they distribute. Great new Kubricks for Pixar, Nightmare and Ren and Stimpy look great.

Also spied the new Qee Domo blinds series 2. Nutso.

New Uglies @ Toy Fair

We can’t wait for the latest and greatest from UglydollsToy Fair promises to be uglier than ever this year.  We’re looking forward to the second line of Uglydoll action figures as well as the public debut of their 2010 plush line — just picked up Pointy Max & Picksey at our local toy store – Big Fun Toys – and they’re outta sight.  But perhaps the most exciting development in Uglyworld is their upcoming line of tin toys.  Unreal.  Check out David Horvath’s blog and Facebook page for updated pics and be sure to check back her during Toy Fair (2/14-17) for our first hand reviews.

Hackbook: External Monitor

Had a little problem when trying to use an external monitor. Somehow I got in to mirror mode, and when I did I lost picture on both the laptop and the external monitor. Found a great fix.

Mirror Displays

It’s a little app you drag onto your control bar. Basically it allows you to switch in and out of mirror mode, without hunting through menus. I use it by placing my mouse over the button, then plugging in the second monitor. If things go goofy, I just click the trackpad button and it tends to right itself. Nice.

Hackbook: 10hr Battery

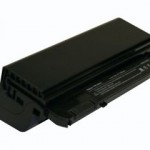
8 Cell Battery for Dell Mini 9/Vostro A90
As I mentioned before, one of the first things I did with my Hackbook was to downgrade the BIOS so I could use 3rd party batteries. Well, I’m happy to say the battery I ordered from MyDigitalDiscounts works great with my laptop. I haven’t tested the duration yet, but plan to on an upcoming 6 hour flight. Hopefully I’ll get to watch at least three films before the juice dies -supposedly the 8-cell battery can provide up to 10.5 hours (YMMV). I’ll report back in another week or so with some real world numbers and I can’t stand reading benchmarks…

One thing to note on this battery – it does give you laptop a high heel effect. The battery is so large that it rakes the entire unit. It actually makes it more comfortable to type on – and the battery has anti-skid pads on it so it should stay put on your desk or tray table. I am a little concerned because the screen won’t tilt as far back as it does with the stock battery. On a desk or lap, that’s no problem – I am a bit wary about the tray table though. We’ll see. I can always prop up the front on a book.

Hackbook: Stuttering video

Plex
Plex
So I’ve been prepping my Hackbook for a long flight. I ripped some movies with Handbrake using the Apple TV settings (figured I might go media server in the future). When I played them back however, the video and audio stuttered. I thought it might have been because I was playing the files off of the SDHC card, but moving them to the SSD didn’t help. I didn’t really wanted to re-encode a bunch of movies so I hit the MyDellMini forums for some suggestions. The answer – Plex.

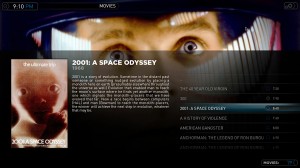
This is a great little piece of software whose primary goal is to turn your mac into a really nice media server you can operate with the little remote doohickey that comes with iMacs. But as a benefit for the Hackbook it makes video playback very smoothly. Plus it has some nice interface features. The setup can be a little quirky, but they have a nice forum you can get answers from.

Plex – works great.

Hackbook: Step 3 – Bluetooth Fix

One of the annoying things with this Hackbook was the inability to turn off Bluetooth – which can quickly run the battery down. Thanks to MyDellMini forums we have a solution. Again, pasted below for the archive.

1. First thing was the restore the bluetooth module by using the DellEFI 1.1 “Fix Bluetooth” custom option.
2. Restart and make sure the bluetooth is on and USB Legacy is off in the BIOS.
3. No boot in “Safe-Mode”. This is explained below. If you know it skip to 6.
(In DellEFI 1.2a i’ve read this is done by holding SHIFT but I haven’t tried this)
4. When you get to the darwin x86 countdown press enter to get the the boot list of available partitions (i.e. Mac HD in my case).
5. You will see a sort of command prompt that says “boot:”.
6. type “-x” after the “boot:” so you get “boot: -x” in the bootloader and press enter.
Now your system should load in Safe-Mode and we’re almost there.
7. Open Terminal and enter:

“sudo pico /System/Library/Extensions/IOBluetoothFamily.kext/Contents/PlugIns/BroadcomUSBBluetoothHCIController.kext/Contents/Info.plist”

,as mentioned in the original post. It should ask for your password so enter this.
PLEASE NOTE: if you are copy pasting, do this thru “Text Edit” so the whole string is copied as the forum seems to add “Returns” to get the formatting right so the terminal editor doesn’t load the info.plist in the end directory. I stupidly had this problem so maybe its just me. 😛

8. Now the terminal editor should load exactly like the picture shown below.
Please make sure you get this screen otherwise check that the string you used above was complete with no spaces so as to actually load the existing info.plist

9. Press “Control+W” (This is the where is or find function) and search for 33301.
(From what I have seen all the original dell bluetooth modules have the same ID’s)

10. When you find 33301 simply use backspace and clear it replacing it with 688.
Also move down with the arrow keys to 1452, clear and type 16700.
Make sure not to add any extra spaces or edit anymore than just these numbers.

11. Now press “Control+O” and then enter to save. You should find it says something like “Wrote 298 lines” on the bottom. you can repeat this just to be sure.

12. Use “Control+X” to exit back to the standard terminal window. Here just type exit and close terminal.

13. Lastly go to “Mac HD>System>Library” and delete Extensions.mkext (may ask for password) and then restart immediately.

14. This worked for me so I hope it works for you but be aware if you run fix bluetooth on DellEFI 1.1 again you will have to repeat the process. I hope I didn’t miss anything. Enjoy

Hackbook: Step 2 – OS Installation

Okay – here’s where things went south. We decided to use the new NetbookInstaller and NetbookBootMaker. In our case we tried 0.8.2 RC4. It was pretty sweet for a while, but when we finally booted up we had no sound. Not sure why. Ran into a couple of others on the boards who had the same issue, but no resolution. It’s a pretty new release so there’s not a lot of discussion on it yet – because of that we decided to try an older version. We we went ahead with the DellEFI Installation from Mechdrew. Pasting here so we have an archive.

DellEFI 1: USB Installation via Mac

Requirements:

  • Intel Mac with OS X Leopard installed
  • 8 GB or greater USB Drive (Flash, HDD, memory card + reader, etc.)
  • Retail Mac OS X Leopard DVD, any version
  • Sotware, as mentioned

*Note: If you use a disc older than 10.5.6, make sure to extract the Mac OS X 10.5.7 update package from the DMG file to a USB drive and have that drive, whether it is you DellEFIBootMaker drive or another one, plugged in when you boot into the OS for the first time. This is a common glitch, 10.5.6 is okay with this.*

Prep Work (On Mac)

1) Download the following software first:
DellEFIBootMaker (note which version to use in the Downloads section)
DellEFI 1.2 alpha 5 (hereafter referred to as DellEFI 1.2a5)
Mac OS X 10.5.7 Combo Update (discs 10.5.5 and below) or Mac OS X 10.5.7 Incremental Update (10.5.6 discs) Actually – we went ahead and used the 10.5.8 update and it worked great. Get it here.

2) Insert the Mac OS X Leopard Install DVD into your Mac, as well as the 8 GB drive. Open Disk Utility (in the Utilities folder of Applications) and select the 8 GB drive in the list. Select the Partition tab, set the Volume Scheme as “1 Partition”, name it OSXDVD, and select “Mac OS Extended (Journaled)” as the Format. Click “Options…”, select “Master Boot Record” and click OK then Apply, then click Partition and confirm your decision by entering your password. (This should only take a minute or two.) Now switch to the Restore tab, drag the OSXDVD partition icon from the left into the Destination field and drag the DVD volume named “Mac OS X Install DVD” to the Source field. (Do not drag the CD Drive model, that will mess things up.) Press Restore, confirm the decision by pressing Restore in the next window, enter your password, and then wait for it to finish. Depending on the drive and disc quality, this can take anywhere from 30 minutes to 1.5 hours.

3) Run the DellEFIBootMaker app (you’ll need to unzip the file first), simply click the “Make DellEFI USB Boot Key” button, enter your password and click okay when it is done. You’ll want to unzip and copy the DellEFI 1.2a5 app to the drive as well. (This next step isn’t necessary, but if you have any more room, or if you have another drive available, you should open the Mac OS X 10.5.7 Combo Update image and copy the file inside to a disk as well.) Eject the DVD and the drive from your Mac, either by a right-click (control+click for you one-buttoned people) or by dragging the icon to the trash.

Installation (On the Dell)

4) Insert the USB drive into your Dell. Turn the Dell on and enter Setup by pressing “2” (the number two.) Navigate to the Advanced tab, and make sure that “USB BIOS Legacy Support” is Enabled and “USB Wake Support” is Disabled. (If you don’t have BlueTooth or do not have a need for it, turn off BlueTooth as well.) Select “Exit Saving Changes” in the Exit tab and your Dell will restart. Now press “0” (the number zero) when you see the Dell logo, and select “USB Storage”. A grey screen with drive icons should appear, select OSXDVD. After this you should see a bunch of scrolling text, and then the Installer screen will appear.

5) Select your language, press Continue, and Agree. Now click Utilities in the Menu Bar, and open Disk Utility. This time we want to select your SSD drive, then select the Partition tab. (This can also be performed on an external flash/HDD drive.) Volume Scheme is “1 Partition”, Name is “OSXMINI9” (all caps, no quotes), Format is “Mac OS Extended (Journaled)”, and you need to click “Options…” to change it to “GUID Partition Table”. Click OK, Apply, and confirm the decision. Once it is done formatting, close Disk Utility, select your new partition, and click Continue. I recommend no matter what your configuration is to press Customize and deselect anything you do not need, such as Language Translations, Additional Fonts, and Printer Drivers, but adjust according to your needs. Click Done, and then Install. This can take anywhere from 20-50 minutes.

6) Installation will most likely fail, but that’s okay, it’s normal. However, do not press Restart; instead, go up to Utilities and select Terminal. When the Terminal window appears, type “postinstall” (without quotes) and after a few seconds it should say, “You are now ready to reboot to a fully functional OSX Install!” Now type “reboot” and your Dell will begin the restart process. It may take a minute or two, so be patient. When your computer does reboot, enter Setup again by pressing “2” (the number two.) Navigate to the Advanced tab. If you have BlueTooth and intend to use it, turn “USB BIOS Legacy Support” is Disabled. If you do not have BlueTooth, or do not intend to use it, keep “USB BIOS Legacy Support” Enabled and set BlueTooth to Disabled. Select “Exit Saving Changes” in the Exit tab and your Dell will restart again. Let it start up as normal and it should show the grey screen again, and will ask which drive to boot from (or perhaps it will automatically boot from the SSD.)

Post-Install

7) You may or may not see the startup video, depending on the version of your Install DVD. Setup your account as you see fit. When it comes to the Migration Assistant, do not transfer settings. When it is all done, you should see your Desktop, with drive icons for your SSD and USB drive. If you are on 10.5.6, you could just leave it like this since all the drivers and the bootloader work just fine, but that would not be ideal since you are not up to date.

8) Now it’s time for DellEFI. You should have copied this to your flash drive earlier, or you could download it now, but either way run the app. If it prompts you about needing to remove or delete a file first, press No. You will need to run a Custom Installation with the following settings:

  • “Reinstall Chameleon 2.0RC1-r431 Bootloader”
  • “Install Dell Mini 9 Extensions”
  • “Hide DellEFI files”
  • “Remove custom dsdt.aml file”
  • “Restore the 10.5.5 keyboard pref pane”
  • “Disable Hibernate and remove sleep file (recommended)”

(You can also select “Remote CD” if you want to use that feature.) Press Install, confirm the decision, and let it run until completion. However, when it comes up with the prompt that says, “All done, ready for reboot” select No.

9) No matter what version you originally installed, you’ll want to install the 10.5.7 update. Either use the Mac OS X 10.5.7 Combo Update for discs 10.5.5 and older, or the Mac OS X 10.5.7 incremental update for 10.5.6 discs. (You can either obtain from the website via your Dell, or it could be stored on another drive, but please note that older disc installations (10.5.5 and below) will probably have a problem opening the DMG. To circumvent this, extract the update package from the DMG to an external drive and plug it in before booting). When the install completes, press Restart. Again we used the 10.5.8 update – worked great. Instead of 10.5.7 – use 10.5.8.

10) This time when it reboots, you will see a little progress bar underneath your SSD icon. Hit the “-” (minus) key before the progress bar disappears, and then type “-x” (no quotes.) If you look in the bottom left corner, you should see white text that says, “boot: -x”; hit enter. This will boot Mac OS X into Safe Mode. Once you log in back to the Desktop, run DellEFI one last time. Use these settings in a Custom Installation:

  • “Reinstall Chameleon 2.0RC1-r431 Bootloader”
  • “Reinstall Dell Mini 9 Extensions”
  • “Hide DellEFI files”
  • “Generate a system specific dsdt.aml file”

Click Install, confirm the decision, and this time press Yes when it is done installing. Ignore the box that appears during the restart process, it is just letting you know that it is still updating some files. This time, you will boot into a fully functioning Mac OS X updated to 10.5.7. Congratulations!

You can now go ahead and rename your SSD to whatever you please, install any other software and adjust any settings at this point. Treat it like any other Mac! Install any update through Software Update, EXCEPT MAJOR OS UPDATES! Those must be installed by downloading the Combo Update from Apple.

mechdrew DellEFI 1 Version 3.03

Hackbook: Step 1 – Downgrade BIOS

Almost no one is going to need to do this. Whatever BIOS your computer came with, you’ll be fine. For me though, I want to use a third-party battery. The company that is providing them says they’re not compatible with any BIOS newer than A04 – meaning A05 is out. Well, my Vostro is running A04 – I should be good, right? Wrong. For some reason Vostro BIOS numbers are one behind Mini 9’s even though they’re an identical computer (save for some cosmetic differences). So my A04 BIOS is the same as a Mini 9’s A05. So I need to downgrade. Turns out it’s super, super simple.

Somms – a big fish in the MyDellMini forums created a great little application that makes it so easy to downgrade or upgrade your BIOS. What you’ll need:

  • USB Key (anything 15mb or bigger)
  • This file
  • A computer running Windows

Here’s what you do.

  1. Unzip the file you just downloaded.
  2. Insert the Flash key you’re going to use (make sure you got any files off of it you don’t want to lose.
  3. Double-click on the .exe file that you extracted and follow the instructions making sure to click “Install To USB Flash Drive” and then selecting the key you want to use.”
  4. When that’s done, eject your key and keep it handy.
  5. Power on your Vostro, while holding down the 0 (zero) key.
  6. In the boot menu, arrow key down to Enter Setup and hit enter.
  7. Arrow key over to the Advanced Tab and make sure USB BIOS Legacy Support is enabled. If not, arrow down to that item, hit enter and change the selection to enabled and hit enter again.
  8. Arrow over to the Exit tab, and choose Exit Saving Changes
  9. Shut down your Vostro.
  10. Insert the USB Key into your Vostro
  11. Power up the computer while holding down 0 again.
  12. Once in the Boot Menu, arrow down to USB Storage and hit enter.
  13. At this point, follow the instructions to Flash your BIOS (in my case I downgraded to Vostro A03). When it’s done, the computer will reboot into whatever OS you’re running.
  14. And in theory the battery I’ve ordered will work… I’ll post back when I receive it.